Mastering Roof Inspections: Asphalt Composition Shingles, Part 23
by Kenton Shepard and Nick Gromicko, CMI®
The purpose of the series “Mastering Roof Inspections” is to teach home inspectors, as well as insurance and roofing professionals, how to recognize proper and improper conditions while inspecting steep-slope, residential roofs. This series covers roof framing, roofing materials, the attic, and the conditions that affect the roofing materials and components, including wind and hail.
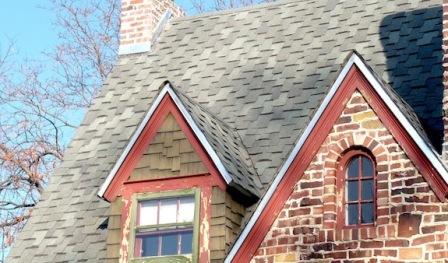
Slope Limitations
Let’s take a look at the actual shingle installation process.
Although we covered them in the articles on underlayment, the following points are worth repeating. There are slope limitations for asphalt shingles.
- On slopes 4:12 and greater, the underlayment should have a 2-inch overlap.
- On slopes from less than 4:12 to 2:12, the underlayment should overlap at least 19 inches.
- Asphalt shingles should never be installed on slopes less than 2:12.
VALLEYS
Valley Types
We know that valleys are especially vulnerable to leakage, so let’s look at the different types and the methods used to construct them. You’ll see two basic types of valleys: open and closed.
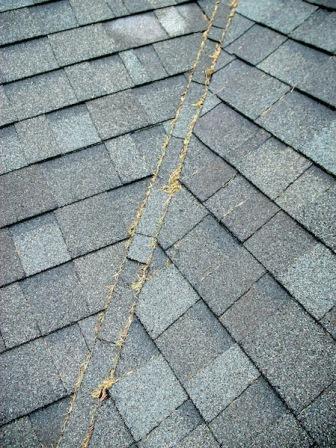
Open Valleys

Open valleys are those in which the roof-covering material stops several inches short of the centerline of the valley. This one is not done well. The valley is protected from moisture intrusion by a lining. Today, most linings are made of metal. But in the past, and in low-end installations, roll roofing or a similar material is used.
Courtesy of Mike Roberson
This is an open valley lined with shingles and is a defective installation.

Here’s a valley where the roll-roofing liner has failed.
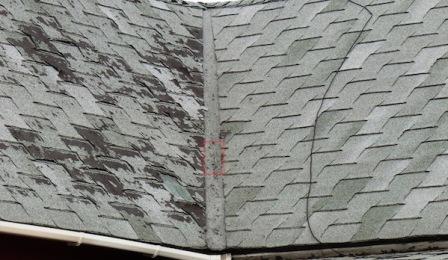
Failed roll-roofing valley liners are common because roll roofing won’t last nearly as long as metal.

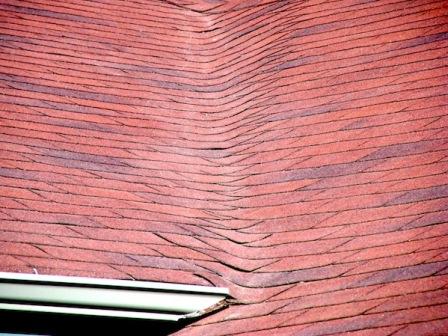
Check to make sure that shingles are sealed well where they end at the valley. A common defect is cross-wash. Cross-wash happens when water running down a roof slope flows across the valley and up beneath the shingles on the adjacent slope.
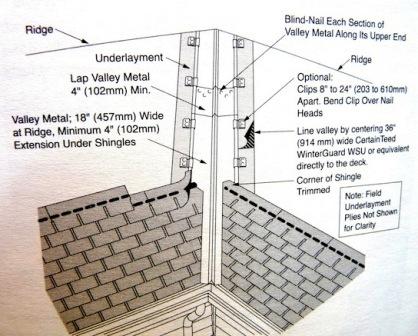
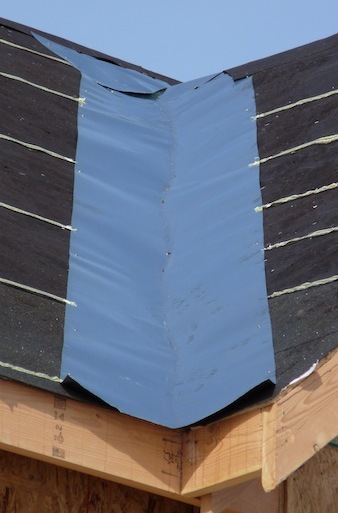
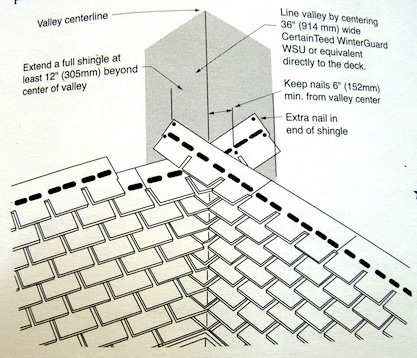
This diagram shows the method recommended by CertainTeed® for installation of an open valley. This is not the only correct method.
Closed Valleys
Closed valleys are those where shingles on one or both sides of the roof extend across the valley onto the adjacent roof slope.
You’ll see two kinds of closed valleys: cut valleys, which are less expensive to install and are the most common; and woven valleys.
Before we tackle these, let’s look at the valley lining, which can be different for closed valleys.
Because valley linings for closed valleys are protected by the shingles, the linings are not exposed to weather, abrasion or impact, and may be made of thick underlayment or thinner metal than that used for open valleys.

This photo shows a cap sheet used as valley lining.
Here, you see metal valley lining, but of a lighter gauge than that used for open valleys.
Cut Valleys

If one slope is steeper or larger than the other, shingles on the larger, steeper slope should be the ones cut parallel to the valley, and shingles on the less steep roof should run through. Since runoff from the smaller roof will be moving more slowly, the valley is less likely to leak due to cross-wash.

This is a quality issue regarding the installation, rather than a defect. So, unless you see signs of leakage, refrain from recommending correction. Many homes have center-cut or badly cut valleys but never have a leakage problem. If you see sloppy work, such as poorly cut valleys, look carefully for other installation problems in other parts of the roof.
California-Cut Valley

Courtesy of Tim Pope
A type of cut valley common in many places appears cut, but it’s not. It’s sometimes called a “California-cut” valley.

With the California-cut valley, shingles from the smaller roof slope are installed across the valley onto the adjacent slope. A valley shingle is then installed parallel to the centerline and offset a couple of inches.
Shingle courses are installed starting at the bottom. Each course is started at the valley, aligning the bottom corner of the first shingle on each course with the edge of the valley shingle nearest the valley centerline. Each course is terminated by cutting off the shingle at the rake.
As work progresses, additional valley shingles are added. To spot this type of valley, look at the bottom of the valley for the triangular shape of the butt of the first valley shingle installed.
Woven Valleys
In roofs with woven valleys, shingles from both roof slopes run through onto the adjacent slope, alternating with each course. You’ll see this done differently with different types of shingles. It should be done in a manner which will prevent runoff from penetrating the shingles.
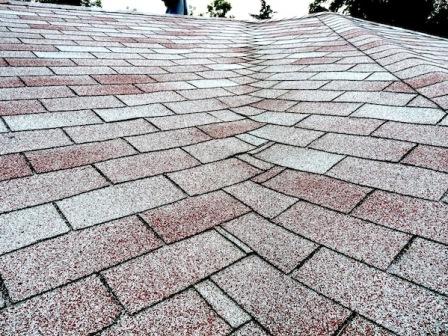
Here, you see a good installation.
You’ll see roofs that are not done quite so neatly. The worse they look, the more closely you should look for signs of leakage. If you comment on poor-quality work, mention whether or not you found evidence of leakage. Especially on an older roof, if poor-quality work has been in place for a significant length of time and has not leaked, refrain from recommending correction. It may be ugly, but if it’s not broken, there’s no need to recommend that it be fixed.
Here are some concerns about woven valleys:
- Woven valleys should never be installed on a roof with a pitch of less than 4:12.
- Heavier shingles, such as laminated shingles, may not bend well across the valley and may fail prematurely by cracking.
- When you see woven valleys on older homes, examine the underside of the sheathing carefully for signs of leakage.
- On newer homes, also mention that it may void the manufacturer’s warranty.

**************************************************
Learn how to master a roof inspection from beginning to end by reading the entire InterNACHI series: Mastering Roof Inspections.

Take InterNACHI’s free, online Roofing Inspection Course
Mastering Roof Inspections
Roofing Underlayment Types
Inspecting Underlayment on Roofs
Fall-Arrest Systems
Roofing (consumer-targeted)
More inspection articles like this