Mastering Roof Inspections: Slate Roofs, Part 5
by Kenton Shepard and Nick Gromicko, CMI®
The purpose of the series “Mastering Roof Inspections” is to teach home inspectors, as well as insurance and roofing professionals, how to recognize proper and improper conditions while inspecting steep-slope, residential roofs. This series covers roof framing, roofing materials, the attic, and the conditions that affect the roofing materials and components, including wind and hail.
FABRICATION
General Fabrication Process

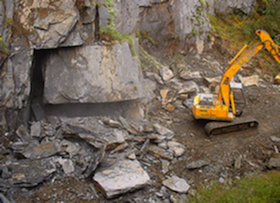
Slate is mined in quarries, with only about 5% of the material removed from the pit as usable for slate tiles.


Large blocks are jack-hammered into smaller blocks. If a large block of slate is allowed to freeze before jack-hammering, the block of stone may shatter into useless shards instead of cleaving cleanly.

Once it has been jack-hammered into smaller pieces, the slate is cut into rectangular blocks of the appropriate height and width for the desired tiles. Individual tiles are then split from the block by hand and eye, using a hammer and chisel.
Slates are then punched for nail holes. The punching process is done from the back of the slate, leaving an area of blow-out around each nail hole in the face of the tile that allows the fasteners to be counter-sunk.
INSTALLATION
Slope Limitations
Slate installed on a roof with a pitch of less than 4:12 should have waterproof underlayment installed beneath it. Slate installed on a roof of less than 4:12 with conventional underlayment is a poor installation. Modern building codes require a minimum slope of 4:12 for slate installation.
Framing and Substrate
The weight of a slate roof is measured in thousands of pounds per square instead of hundreds of pounds, as is typical for most roof-covering materials. A slate roof can weigh up to 8,000 pounds per square, although 3,500 pounds is considered heavy. It’s important to inspect the framing and sheathing from inside the attic. Check rafters for sagging.
Sheathing can be spaced boards, battens or panels, such as OSB or plywood. It should be 3/4-inch minimum. The ½-inch sheathing used on most roofs is inappropriate for a slate roof because it may result in broken slates. Check any areas for advanced decay where you see evidence of past leakage. Spaced boards are a higher-quality installation than plywood or OSB. Most modern codes require solid-roof sheathing to be installed beneath slate shingles.
Underlayment
As you already know, felt underlayment is not permanent and deteriorates as it loses volatile oils over time. This is less of a problem with asphalt shingles because the lifespan of the shingles and felt are likely to be fairly similar.
Because slate roofs have a much longer lifespan, it’s more likely that the underlayment will deteriorate more rapidly than the slate. Of course, the underlayment is mostly hidden beneath the slate, although you may be able to inspect it from the attic if the roof sheathing consists of spaced boards. When inspecting older homes, you should be sure to mention in your inspection report the limitations of inspecting underlayment, even if you don’t see signs of leakage during the inspection. It’s important to give your client realistic expectations, as well as limit your liability.
The quality of the slate tile installation becomes much more important in preventing leaks in roofs with deteriorated underlayment. Many slate roofs have been installed with no underlayment, and leakage is typically not a problem if the slates were installed correctly. If you find a slate roof with underlayment missing, mention this in your report, but refrain from calling it a defect unless you know that it was required by the building code in effect at the time the home was built in the jurisdiction where the home is located. Most modern building codes call for underlayment to be installed beneath slate tiles.
Interlayment
One method used to save money during installation is interlayment of slate. Using this method, the slate exposure is increased substantially in order to save money by using fewer slates. Under normal conditions, this increases the risk of leakage dramatically. In an effort to reduce that risk, a layer of felt is installed as interlayment between each course of slates.
Once the felt has deteriorated -- which will probably happen much sooner than the slate -- the roof will be more likely to leak, and the repair will involve removal and re-installation of the slate roof. If it’s re-installed with a proper exposure, there won’t be enough slates, and then the problem will be in finding matching slates. It’s a very good idea to alert your client if you find slate installed with interlayment.
Colors
**************************************************
Learn how to master a roof inspection from beginning to end by reading the entire InterNACHI series: Mastering Roof Inspections.

Take InterNACHI’s free, online Roofing Inspection Course
Mastering Roof Inspections
Roofing Underlayment Types
Inspecting Underlayment on Roofs
Fall-Arrest Systems
Roofing (consumer-targeted)
More inspection articles like this