Mastering Roof Inspections: Flashing, Part 2
by Kenton Shepard and Nick Gromicko, CMI®
The purpose of the series “Mastering Roof Inspections” is to teach home inspectors, as well as insurance and roofing professionals, how to recognize proper and improper conditions while inspecting steep-slope, residential roofs. This series covers roof framing, roofing materials, the attic, and the conditions that affect the roofing materials and components, including wind and hail.
ROOF-WALL INTERSECTIONS
Places where roofs and walls intersect are very common. They’re called headwalls and sidewalls.
A headwall is a level junction where a roof meets a wall.

This illustration shows proper flashing at a headwall condition.
Headwall flashing should extend up behind the exterior wall covering and down over the roof-covering material, as you see here.

This is true no matter what type of roof-covering material is installed.

Flashing should overlap the roof-covering material, but on asphalt shingle roofs, for aesthetic reasons, the part of the headwall flashing that extends down over asphalt shingles is often covered with a course of shingle tabs.

Don’t mistake this condition for headwall flashing routed beneath the shingles and call it a defect.

No minimum headwall flashing dimensions are provided that are applicable to every manufacturer and jurisdiction, so you’re only concerned with seeing that headwall flashing is installed in a manner that will keep the water out. Common flange sizes are 4 inches by 5 inches. Headwall flashing typically comes bent to 120° and can be fairly easily flattened for roofs with shallower pitches.
Occasionally, you’ll see a roof which has had 90°-sidewall flashing installed as headwall flashing. These don’t bend well to accommodate roofs with steeper pitches, and you’ll often see gaps beneath the flashing. Wind-driven rain can enter at these gaps, causing roof leaks.
SIDEWALL FLASHING
A sidewall is a junction between a wall and a sloped portion of a roof.
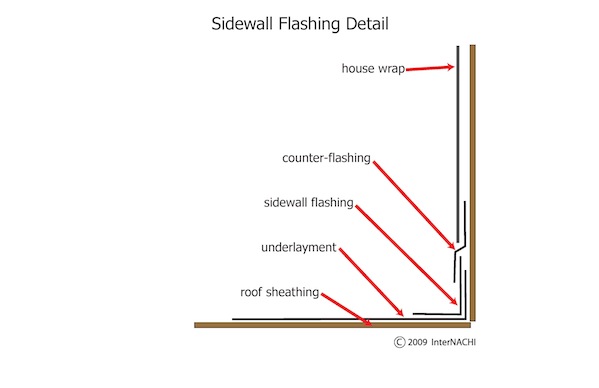
Except where walls are brick, the vertical part of the sidewall flashing should extend up behind the exterior wall covering, just like with headwalls.
The horizontal part of the flashing will vary, depending on the type of roof-covering material
Step Flashing
Sidewalls on roofs covered with asphalt shingles, wood shingles, shakes and slate should be flashed using step flashing, like you see here.

Step flashing consists of short pieces of flashing, each installed to overlap the shingle in the course below, and to be overlapped by the shingle in the course above. All shingle manufacturers require step flashing at sidewalls for both asphalt, wood and slate.
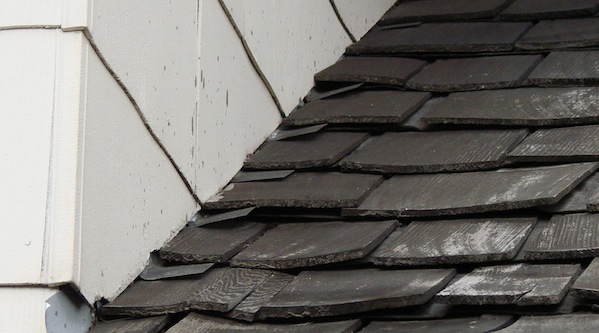
If you see continuous, one-piece flashing like this used as sidewall flashing with shakes, shingles or slate, it’s a defective installation, no matter how often you see it.

Here’s an example of an asphalt shingle roof with continuous flashing installed.
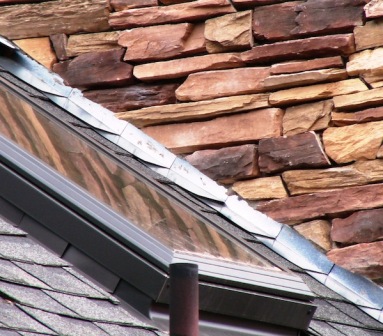
This is an example of a defective installation where an asphalt shingle roof meets a stone sidewall. Instead of installing the step flashing between shingles, the flashing rests on top of the shingles.


It’s not unusual to see sealant installed when sidewall flashing is missing. Sealant will eventually dry, shrink and crack.
You’ll see sealant substituted for flashing in a lot of different areas on roofs. When you see it, you should recommend replacement with proper flashing, or annual inspection and re-application of an appropriate sealant, as necessary.

Tile roofs should have continuous pan flashing installed at sidewalls, and it’s sometimes difficult to confirm. You can probably lift the butt of the lowest tile enough to see. Pan flashing is continuous flashing that has a lip on the flange which extends beneath the tile so that the horizontal part of the flashing acts as a water channel.
Step Flashing Sizes
Step flashing size requirements vary according to manufacturer. Manufacturers' requirements can vary anywhere from 2 inches to 10 inches, and you probably won’t be able to see the sidewall flashing completely, anyway. The vertical side will be hidden behind the exterior wall-covering material.
You aren’t required to confirm compliance with manufacturer’s installation requirements, but you should be able to confirm that step flashing is installed by looking at the exposed portion and making sure that it extends up behind the exterior wall-covering material.
Sidewall Gap

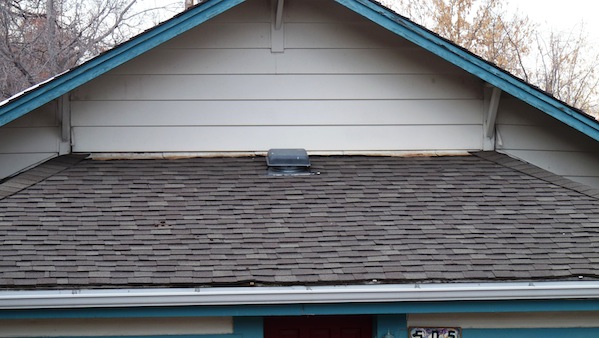
In both headwall and sidewall conditions, unless the exterior wall is brick, you should see a gap of at least 1½ inches between the bottom of the exterior wall-covering material and the top of the roof-covering material.
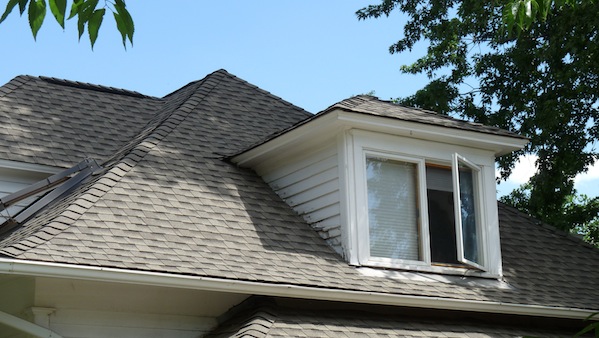
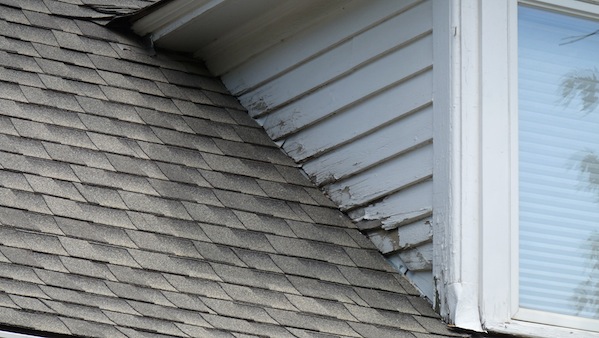
You’ll often see exterior wall coverings installed right down on top of the shingles. Without a gap, the exterior wall covering can wick up moisture from the roof. This can lead to decay, delamination, peeling paint, and other problems. This condition is especially common on roofs with multiple layers of shingles.

The gap can be present but difficult to see on tile roofs. You can see it in this photo if you look at the base of the sidewall just to the left of the downspout termination.
Looking at this same area, you’ll see that several tiles are cut short. Unless the pan flashing is fairly wide, this may allow enough moisture entry to cause a leak, and it should be mentioned in your inspection report. You’ll also notice poor installation at the inside corner, and a broken tile at the ridge.
You’d want to check this area carefully to evaluate the chances for moisture getting past the tile. At the inside corner, the headwall flashing that extends out over the tile was not installed high enough.
**************************************************
Learn how to master a roof inspection from beginning to end by reading the entire InterNACHI series: Mastering Roof Inspections.

Take InterNACHI’s free, online Roofing Inspection Course
Mastering Roof Inspections
Roofing Underlayment Types
Inspecting Underlayment on Roofs
Fall-Arrest Systems
Roofing (consumer-targeted)
More inspection articles like this