Mastering Roof Inspections: Tile Roofs, Part 2
by Kenton Shepard and Nick Gromicko, CMI®
The purpose of the series “Mastering Roof Inspections” is to teach home inspectors, as well as insurance and roofing professionals, how to recognize proper and improper conditions while inspecting steep-slope, residential roofs. This series covers roof framing, roofing materials, the attic, and the conditions that affect the roofing materials and components, including wind and hail.
As is recommended for the installation of other roof-covering materials, it’s important that the manufacturers’ recommendations be followed for installing both concrete and clay tiles. Recommendations may be different for different types of tile and for similar types made by different manufacturers. Recommendations for similar types may change over time. So many tile installation methods have been recommended over the years that describing proper installation methods for all types of tile exceeds the scope of this article series, as well as the requirements of a home inspection.
Unless you have a thorough understanding of the installation requirements for the particular type of tile on the roof you’re inspecting, you should clearly disclaim proper installation. Using your experience and common sense, you can often identify deficiencies of a tile roof, but you want your clients to have the clearest possible understanding of the limitations of your inspection. You want your clients to have realistic expectations. If they want a more definitive inspection, they can hire a qualified contractor. Unless you make clear the limitations of your inspection, your clients may not realize the potential need for further inspection, and you may incur liability.
According to modern building codes, concrete and clay tiles should be installed according to the manufacturers’ instructions, based on the following:
- climate zone;
- roof slope;
- underlayment system; and
- type of tile being installed.
As an inspector, you’ll be looking at homes of many different ages, and older tile roofs may not comply with modern codes, nor are they required to. A home inspection is an inspection for safety issues and system defects, not code compliance.
When inspecting a tile roof, you’ll be looking to see if the installation method used appears to be adequately protecting the home from moisture intrusion and holding tiles securely in place.
In addition to looking for obvious defects and failures in installation, you’ll be evaluating the condition of the tile, trim, flashing and fasteners. Because tile can have a long service life, it may outlast the fasteners and flashing.
Some jurisdictions, such as cities, counties and states, may have regulations that affect tile installations. If this is the case in the areas where you often inspect, you may want to take time to learn those regulations.
Roof Sheathing
According to modern building codes, concrete and clay tiles may be installed over either solid or spaced roof sheathing.
Minimum Roof Slope
Also, according to modern building codes, concrete and clay tiles may be installed on roofs with slopes of 2:12 and greater, although roofs with slopes of 4:12 and less must have a double layer of underlayment.
Underlayment
The type of underlayment installed beneath concrete and clay tile should conform to the manufacturer’s installation recommendations.
Modern building codes call for underlayment beneath concrete and clay tile to be 30-pound felt or mineral-surfaced roll roofing.
Low-slope conditions, such as roofs with slopes of 2:12 to 4:12, should have a double layer of underlayment beneath all of the tile.
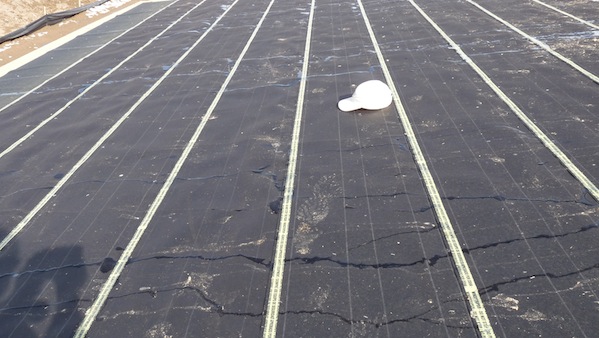
This means that underlayment should be overlapped a minimum of 19 inches, as you see in the photo above.
For slopes greater than 4:12, underlayment must overlap a minimum of 2 inches.
Flashing
Modern building codes have minimum requirements for headwall, sidewall and valley flashing for tile roofs. These requirements may be superseded by the manufacturer’s installation recommendations.
Headwalls and sidewalls should have flashing and counter-flashing, although you’ll often see the exterior wall-covering material used as the counter-flashing. Although it may not be code-compliant, as long as the method used prevents runoff from entering behind the flashing, the method used is effective. Building codes call for flashing to be a minimum of 0.019 inch, but, as an inspector, you’ll have no way of confirming this. If the flashing looks too thin, recommend that proper flashing be confirmed by a qualified contractor.
Modern building codes call for valley flashing to:
- extend a minimum of 11 inches on both sides of the valley centerline; and
- have a formed splash diverter rib at least 1 inch high down the valley centerline.
For flashing materials, you may see galvanized steel, copper, aluminum and lead.
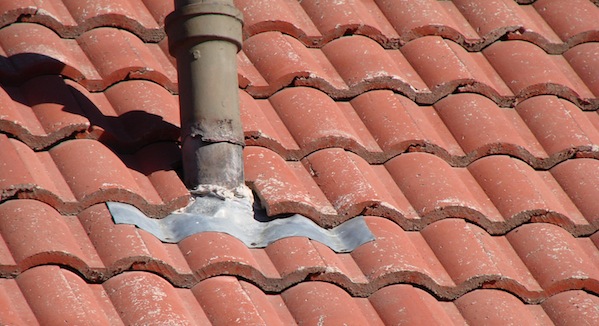
Flashing at field tiles, such as that used for penetrations, including plumbing stack pipes, combustion vents and skylights, is often bent to fit the profile of the tiles, as you see in the photo above.
Fasteners
Proper fastening of tiles can be difficult to confirm. Tiles may be attached with nails, screws, clips, wire, foam or caulk adhesive, or mortar. Fastening varies with the age of the roof, the type and weight of the tile, basic wind speeds at the home site, the roof’s height, the manufacturer’s recommendations, and jurisdictional requirements.
Some types of tile -- notably, those with lugs that hang from battens and that are installed on roofs with slopes of less than 5:12 -- may require no fasteners at all, or fasteners installed only along the perimeter. Fastening requirements may be different for field, rake and cap tiles.
According to modern building codes:
- Nails must be corrosion-resistant, with heads that are a minimum of 5/16-inch in diameter and of sufficient length to penetrate the deck ¾-inch, or through the thickness of the deck, whichever is less.
- When special perimeter fastening is required, the perimeter area includes a minimum of three courses, but not less than 36 inches from roof edges, and from either side of the hips and rakes.
- Perimeter tiles shall be fastened with a minimum of one fastener per tile.
- Tiles weighing less than 9 pounds per square foot shall have a minimum of one fastener each, regardless of roof slope.
- Tiles shall be installed in accordance with the manufacturer’s installation instructions in areas where the wind speed exceeds 100 mph and where the roof is located more than 40 feet above grade.
- In areas subject to snow, tiles shall be fastened with a minimum of two fasteners. In other areas, tiles shall be attached according to the table below.

**************************************************
Learn how to master a roof inspection from beginning to end by reading the entire InterNACHI series: Mastering Roof Inspections.
