STANDARDS OF PRACTICE
The International Standards of Practice for inspecting the roof system is located at www.nachi.org/sop.
MASTERING ROOF INSPECTIONS
To learn about inspecting concrete tile roofs, please visit Mastering Roof Inspections.
What To Inspect
During an inspection of concrete tile, you should look for the following types of problems:
- installation, including:
- fastening;
- proper exposure; and
- flashing.
- broken, damaged and missing tiles;
- environmental problems, such as biological growth;
- manufacturing problems, such as spalling, voids and shrinkage cracks; and
- excessive weight.
DAMAGING TILE
You’ll notice that many of these concrete double-roll tiles are cracked or broken. This is due to carelessness of the roofers. Even most older concrete tiles can be walked if the inspector is careful and knows how.
WALKING TILES
The proper way to walk all tile is to step on the headlap, which is the area in which upper tiles overlap tiles in the course below.
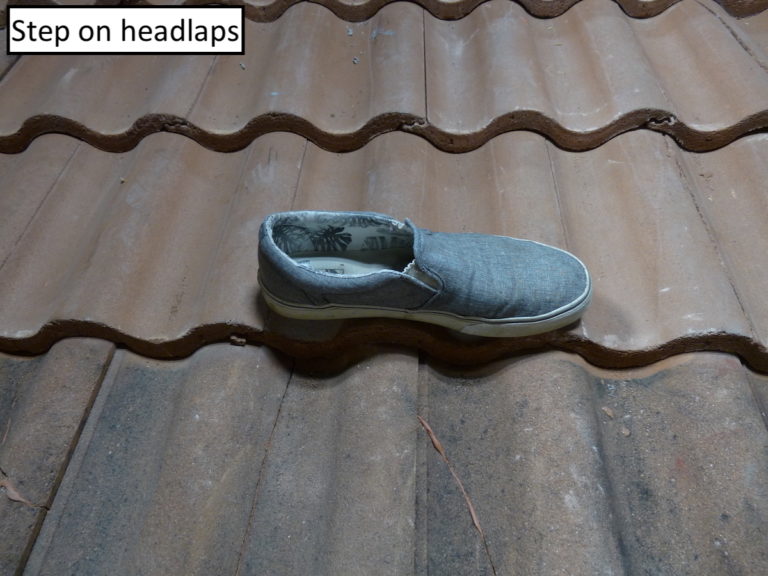
Headlaps are typically 3”. By stepping on the headlap, the inspector’s weight will be transferred directly to the floor, as opposed to stepping on another part of the tile that will provide no support directly beneath the part of the tile under the inspector’s foot. Move slowly in order to impact tile as little as possible.
Broken Right Corners
With interlocking tile like these, you may se many broken right corners. You’ll notice that where the tiles interlock- at the “underlock” that forms the water channel and the overlying “coverlock” the tile is only half the thickness of the main body of the tile.
Observation
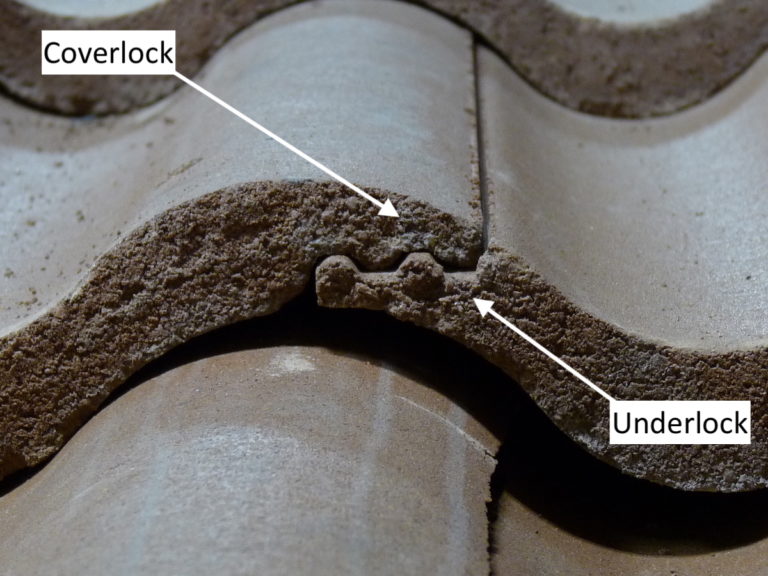
Coverlocks are typically located on the right sides of tile. Because they are thinner, coverlocks are more vulnerable to breakage from foot traffic.
CONCRETE TILE AGING
Concrete tiles age mainly by erosion of cement from between the sand particles.
Observation

This process will be accelerated by pressure washing, which is the required cleaning method for many housing developments in South Florida and a commonly used method elsewhere.
On this roof you can see both old and new tiles, and you’ll notice that many of each are cracked.
As concrete tiles approach the ends of their useful lives, they become more absorbent. The signs to look for are:
- Efflorescence: Appearing as a white powder on the tile upper surface (it’s “face”) efflorescence is the result of water seeping through cementicious materials (it’s also commonly seen with concrete and masonry foundation and retaining walls). As moisture moves through the material, it dissolves mineral salts. When the moisture reaches the surface it evaporates and the mineral salts are deposited as crystals, and over time, accumulate on the tile surface.
- Microbial growth: Because absorbent tile holds more water, and holds it longer, these elevated moisture levels encourage various types of growth, including mold fungi, moss, lichen, and algae.
INSTALLATION
Generally, InterNACHI teaches according to the Standards of whatever organization is most likely to be accepted by building jurisdictions. For tile installed across most of the USA, this is the Tile Roofing Institute (TRI), and inspectors working outside of South Florida should refer to their free, online, installation manuals, including one for moderate climate regions, and one for cold climate regions.
Florida has installation requirements different from most areas of North America, due to its location in the High Velocity Hurricane Zone (Broward and Miami-Dade counties) and for the rest of Florida, its position in the path of seasonal hurricanes.
TRI and the Florida Roofing, Sheet Metal, and Air Conditioning Contractors Association (FRSA) have worked together to develop tile installation guidelines specifically for Florida.
Either single-ply or two-ply underlayment systems may be used. A full explanation lies beyond the scope of this format, but we strongly recommend that you study the TRI/TRI-FRSA tile roofing manuals applicable to the areas in which you work by following one of the links above.
Underlayment
With tile roofs, underlayment forms the primary moisture barrier.
The method used in Florida is first a layer of #30 black felt, (typically) fastened with cap nails every 12” in the field and 6” at laps. Next, edge metal is installed along the eaves, and then a layer of self-adhering/self-sealing (commonly called “peel-and-stick”) underlayment is installed over the felt and edge metal. In valleys, valley metal is installed at the same time as edge metal… above the felt and below the peel-and-stick.
Note: a large percentage of “self-sealing” underlayment fails to completely self-seal. Often, self-sealing requires that the fastener head press against the underlayment, forming a gasket condition. With installation of tile fasteners, this will not happen.
Penetrations
Penetrations should be sealed against moisture intrusion at the underlayment level, and flashed at the tile surface level with flashing that conforms to the tile profile, typically lead.
Observation
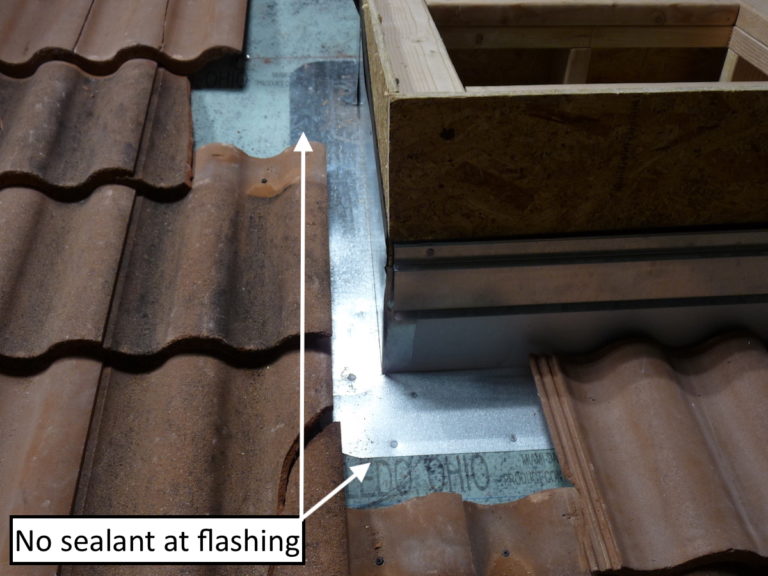
You can see that at the skylight, no sealant has been applied.
Typical Florida installation:
Observation
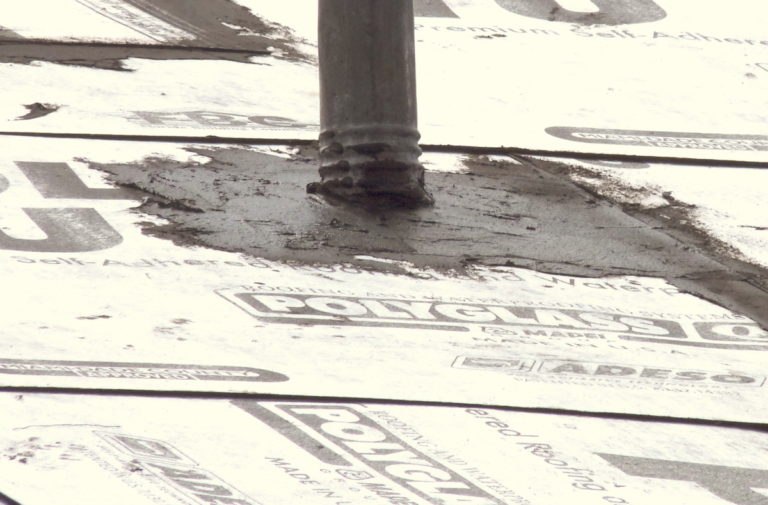
Typical plumbing stack vent installation: sealant at the underlayment.
Observation
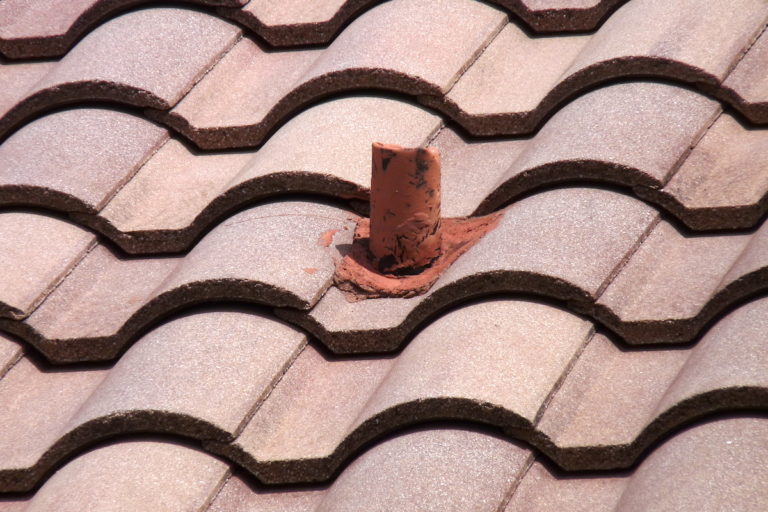
Mortar flashing: not correct but extremely common.
Observation
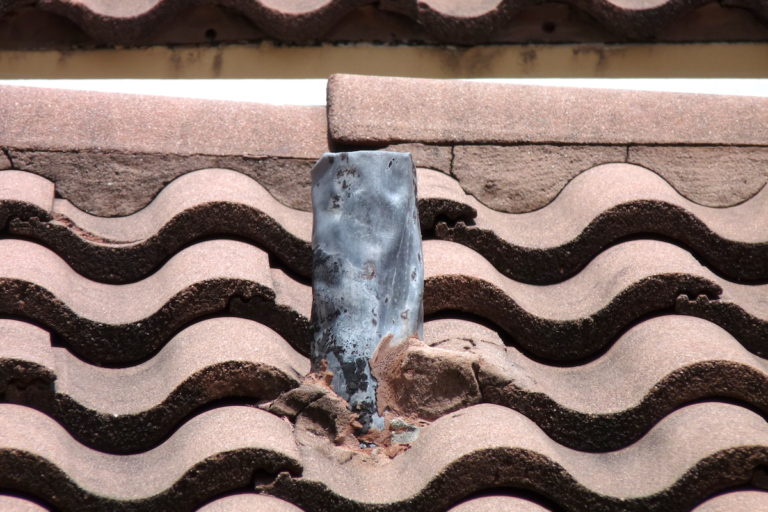
Mystery Method 1
Observation
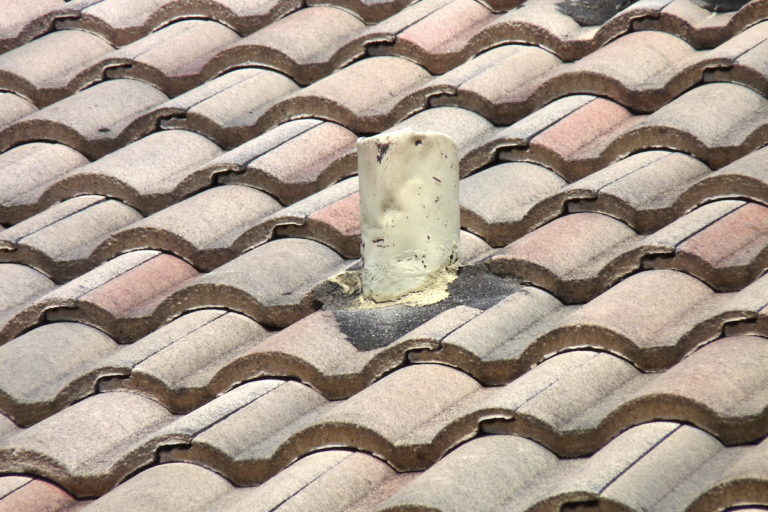
Mystery Method 2
Starter Course
The butts of tiles in the starter course should be lifted into the same plane as tiles in the field. This is typically done by installing a closure (also called “birdstop) of some type, typically metal fabricated to the same profile as the tile, or sometimes mortar is used.
Observation

Whatever method is used, the closure should have holes that allow any water flowing beneath the tile to escape.
Field Tiles
Tiles have been fastened with drywall screws. All fasteners should be corrosion resistant. No fasteners should be visible in the final installation except at the rake tiles.
Tile roofs in Florida are now commonly adhered to the roof with foam. In the past, fasteners were more common. Also in the past, inappropriate foam types were used and these roofs were subject to premature failure.
Cap Tiles
Cap tiles may are most likely to be lost first due to their increased exposure and vulnerability to wind damage. They may be adhered with mortar or mechanically fastened. On this roof, they are not fastened.
(Mechanical) Fastening Schedules
Fastening schedules will vary with jurisdiction, especially in areas designated “high-wind”. Typically, tiles within 3’ of the roof edge must be fastened. Sometimes, the remaining field tiles are not required to be fastened.
Headwall Flashing
Headwall flashing should be installed both at the underlayment level, and on top of the tile
Observation
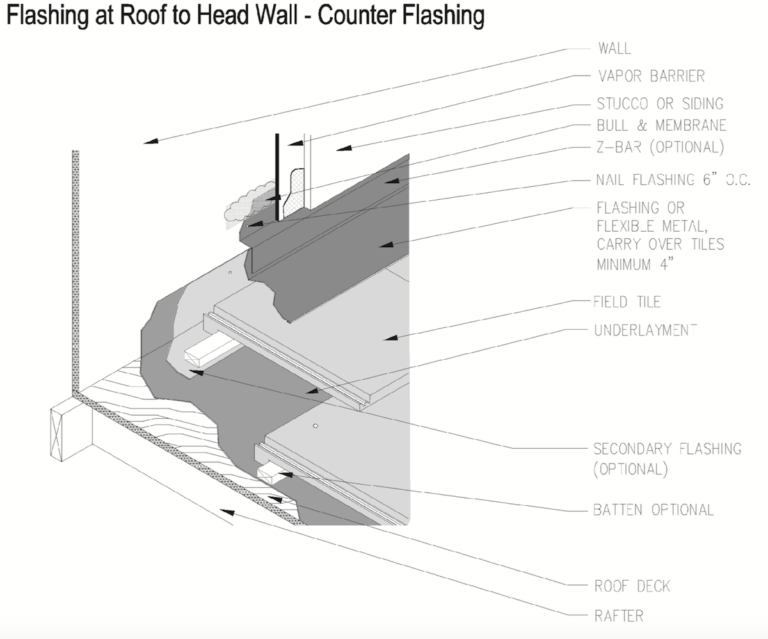
This image shows flat tiles but the method is the same for profile tiles. Headwall flashing should conform to the tile profile. For this reason good installations will use lead. When flat headwall flashing is used a foam closure or mortar should be installed to keep out wind-driven rain. No headwall is installed on this roof to divert runoff to the tile surface. This is a defective condition.
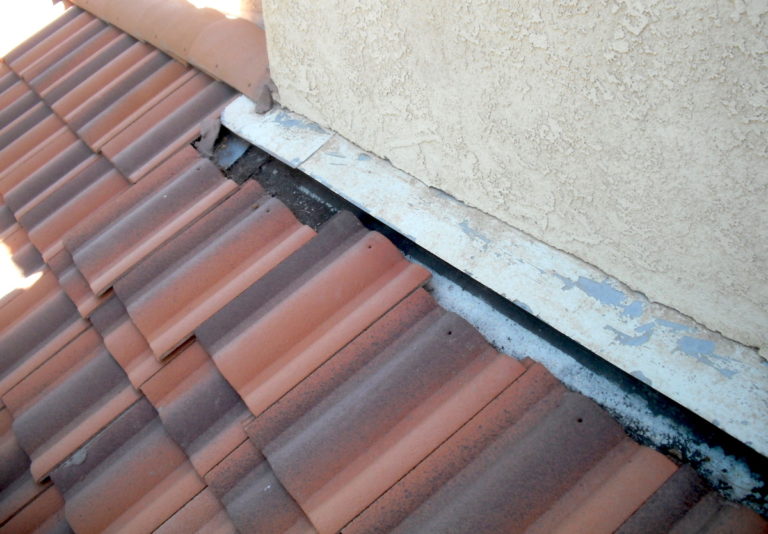
Sidewall Flashing
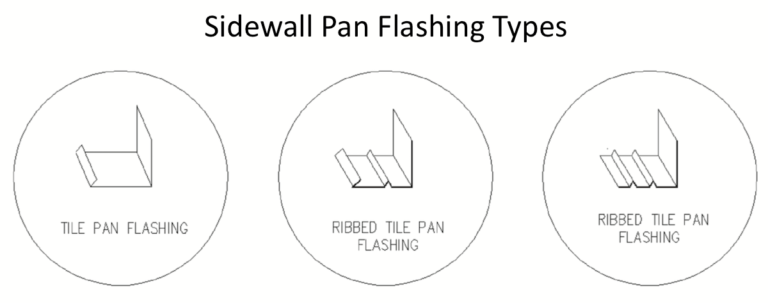
Sidewall pan-flashing should be installed at the underlayment level. Pan-flashing forms a water channel to contain runoff and prevent its spread across the underlayment.
Note: As you can see, at this house, neither headwall or sidewall flashing have been installed according to the TRI/FRSA recommendations, but this type of installation is common in South Florida. Be careful in calling this condition a defect in areas in which a certain installation type is very common, is safe, and doesn’t cause problems. In these situations, other parties in transaction will have powerful arguments against your report and you are likely to develop a reputation that will cost you work while you gain little or nothing.
Slipping Tiles
Where the heads of tiles have had to be cut (like at headwalls and downhill sides of chimneys) to keep butts aligned, The holes may have been cut off. Tiles fastened with nails may be adhered with whatever product is available, often an inappropriate one.
Observation
When this happens, tiles may slip. In the photo above, the headwall flashing made it inconvenient to nail the tile so it was just left to slip.
DEFECTS
Widespread broken tile.
Observation
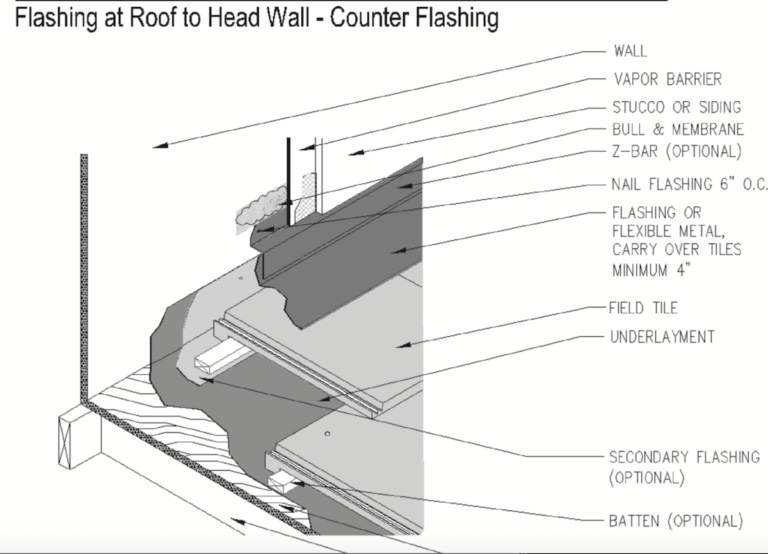
Inadequate headwall flashing.
Observation
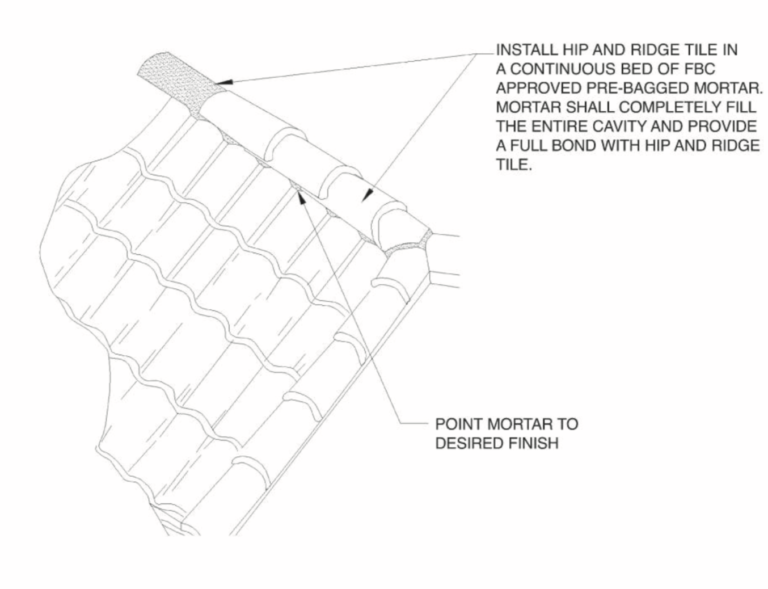
Ridge and hip cap tiles not attached.
Improper fasteners types.
No sealant at penetrations.
No cricket above chimney.
